
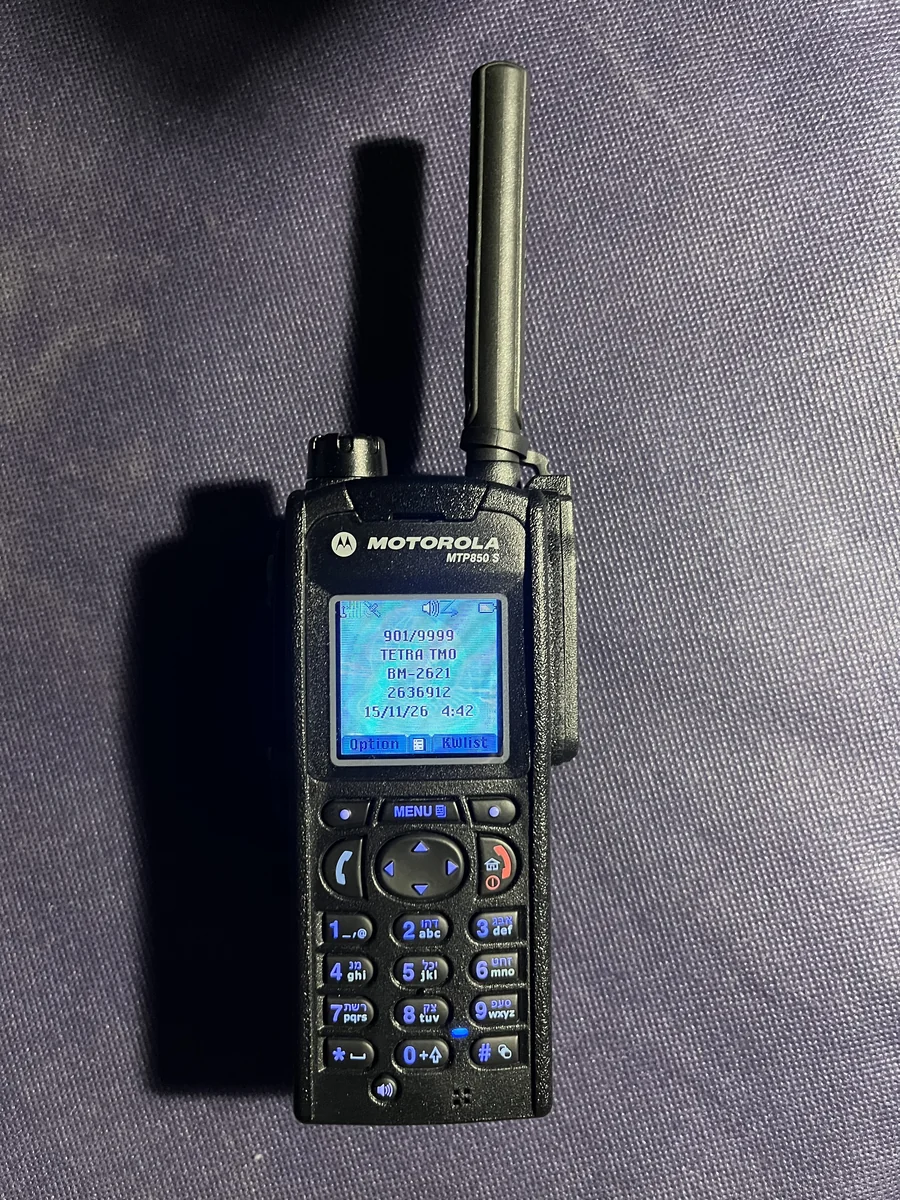
After setting up my Motorola MTP850s for TETRA, I wanted my own TMO cell. I already had a Raspberry Pi and added an SXceiver board with SX1255. This article covers BlueStation setup and the BrandMeister connection.
I have since built a web interface, shown below. The unexpected modification after my TCXO failed is described separately in the Si570 replacement project.
- Prepare Raspberry Pi and SXceiver
- Install drivers and BlueStation
- Frequencies, network and BrandMeister
- First start and automatic startup
- My web interface and screenshots
1. Prepare Raspberry Pi and SXceiver
My initial setup uses a Raspberry Pi 4 with 1 GB RAM, running 64-bit Raspberry Pi OS. Ethernet connects it to the router; the SXceiver sits on the GPIO header. RX and TX have separate antenna connectors.
Fit the board with the Pi powered off. Connect antennas or suitable terminations before starting transmission. Check the supply carefully: a high wattage label on a USB charger means little if its 5 V output sags. A shorter USB-C cable alone made a difference here.
Start with these checks:
uname -m
vcgencmd get_throttled
ls /proc/device-tree/hat
aplay -l
arecord -l
aarch64 indicates a 64-bit system. The desired get_throttled result is 0x0: the queried undervoltage and throttling bits are then clear. SXceiver must also appear among ALSA devices.
My HAT EEPROM was already configured. If detection fails, consult the SXceiver documentation. The overlay must match the board revision; do not rewrite EEPROM as a precaution.
2. Install the driver and BlueStation
Want the web interface too? Use the complete installation guide and matching download. The steps below describe the basic setup without dashboard extensions.
BlueStation by Midnight Blue handles TETRA, while SoapySX connects the SXceiver. BlueStation is an experimental TETRA stack under development.
These steps are for a new installation. Sources are pinned so the driver patch matches the intended revision.
sudo apt update
sudo apt install --no-install-recommends git make g++ cmake pkg-config \
  libsoapysdr-dev soapysdr-tools libasound2-dev libssl-dev \
  libgpiod-dev clang llvm-dev libclang-dev alsa-utils unzip
You also need Rust and Cargo; install them from rustup.rs. Open a fresh terminal or load the environment specified by rustup. I use one build job on the 1 GB Pi; sufficient swap or ZRAM helps.
I modified SoapySX startup to supply the reference clock and both radio frequencies explicitly, instead of using automatic clock detection and a PLL search at startup.
Download SoapySX startup patch and configuration template: driver patch, example configuration, simple service template and licence. The web interface is not included.
Extract the ZIP in your home directory, then run:
mkdir -p "$HOME/tmo-src"
cd "$HOME/tmo-src"
git clone https://github.com/tejeez/sxxcvr.git
git -C sxxcvr checkout 9705147dd8c189625071f3f163ea56119bda4a05
cd sxxcvr
git apply --check "$HOME/soapy-sx-startparameter/sxxcvr-fixed-startup.patch"
git apply "$HOME/soapy-sx-startparameter/sxxcvr-fixed-startup.patch"
cmake -S SoapySX -B SoapySX/build
cmake --build SoapySX/build -j1
sudo cmake --install SoapySX/build
sudo ldconfig

cd "$HOME/tmo-src"
git clone https://github.com/MidnightBlueLabs/tetra-bluestation.git
git -C tetra-bluestation checkout 09d4e0d9a0b8cf6c881e77353db325df9a4715aa
cd tetra-bluestation
CARGO_BUILD_JOBS=1 cargo build --release --locked
sudo install -d /opt/tetra-bluestation/bin
sudo install -m 755 target/release/bluestation-bs /opt/tetra-bluestation/bin/
Revisions are 9705147 for SoapySX and 09d4e0d for BlueStation. See also BlueStation’s build guide, especially for other operating systems.
3. Frequencies, network and BrandMeister
Create a dedicated service account and configuration:
sudo useradd --system --user-group --home-dir /var/lib/tetra-bluestation \
  --no-create-home --shell /usr/sbin/nologin tmo
sudo usermod -aG audio,spi,gpio tmo
sudo install -d -o tmo -g tmo -m 750 /var/lib/tetra-bluestation
sudo install -d -o root -g tmo -m 750 /etc/tetra-bluestation
sudo install -o root -g tmo -m 640 "$HOME/soapy-sx-startparameter/config.toml" \
  /etc/tetra-bluestation/config.toml
sudo nano /etc/tetra-bluestation/config.toml
Check frequencies, cell parameters and your own credentials. My setup uses:
| Setting | My value |
|---|---|
| Cell output / TX | 438.275 MHz |
| Cell input / RX | 430.675 MHz |
| Duplex spacing | 7.6 MHz, input below output |
| MCC / MNC | 901 / 9999 |
| Location Area / Colour Code | 1 / 1 |
| Radio duplex-table entry | 7, configured for 7.6 MHz |
| Reference clock | 38.4 MHz |
| Sample rate | 600,000 samples/s |
These are my settings, not universal defaults. The frequency pair and codeplug must agree. The duplex-table entry is easy to overlook: index 7 alone does not tell the radio that your table contains 7.6 MHz there.
TOML frequencies are in Hz. Changes also require updating startup_rx and startup_tx in the device line and the values under [cell_info]. My main carrier is 400 MHz + 1531 × 25 kHz = 438.275 MHz. See the configuration guide.
Why the hotspot ID ends in “01”
BrandMeister is reached through TetraPack and the Brew protocol, using core.tetrapack.online, port 443, TLS, your Radio ID plus hotspot suffix, and the associated hotspot password.
My TETRA Radio ID is 2636912. Appending 01 gives 263691201, allowing BrandMeister to distinguish multiple hotspots with the same Radio ID. Another could use 02; no new Radio ID is needed.
The nine-digit number belongs in the hotspot login. The radio keeps its seven-digit participant ID. Replace username = 0 in the template with your hotspot ID. password is the hotspot password, not your BrandMeister website login password.
If you still need to configure the handset, see Motorola MTP850s for TETRA TMO.
4. First start and automatic startup
For the first attempt, run BlueStation in a terminal to see whether SXceiver opens and the network connects:
cd /var/tmp
sudo -u tmo /opt/tetra-bluestation/bin/bluestation-bs \
  /etc/tetra-bluestation/config.toml
Select the matching TMO network and a talkgroup on the radio; I use TG 2621, among others. The radio should register on the cell. BrandMeister Last Heard then shows whether a call from the cell reaches the network.
Press Ctrl+C to stop. Once the first test works, install the supplied service template:
sudo install -m 644 "$HOME/soapy-sx-startparameter/bluestation-bs.service" \
  /etc/systemd/system/bluestation-bs.service
sudo systemctl daemon-reload
sudo systemctl start bluestation-bs
journalctl -u bluestation-bs -n 60 --no-pager
sudo systemctl enable bluestation-bs enables startup at boot; sudo systemctl disable bluestation-bs disables it. Neither changes an already running transmitter; stop it with sudo systemctl stop bluestation-bs.
The template uses the oscillator on the HAT. My later external-clock modification is in the Si570 project. It is unnecessary for a working standard HAT.
Registered
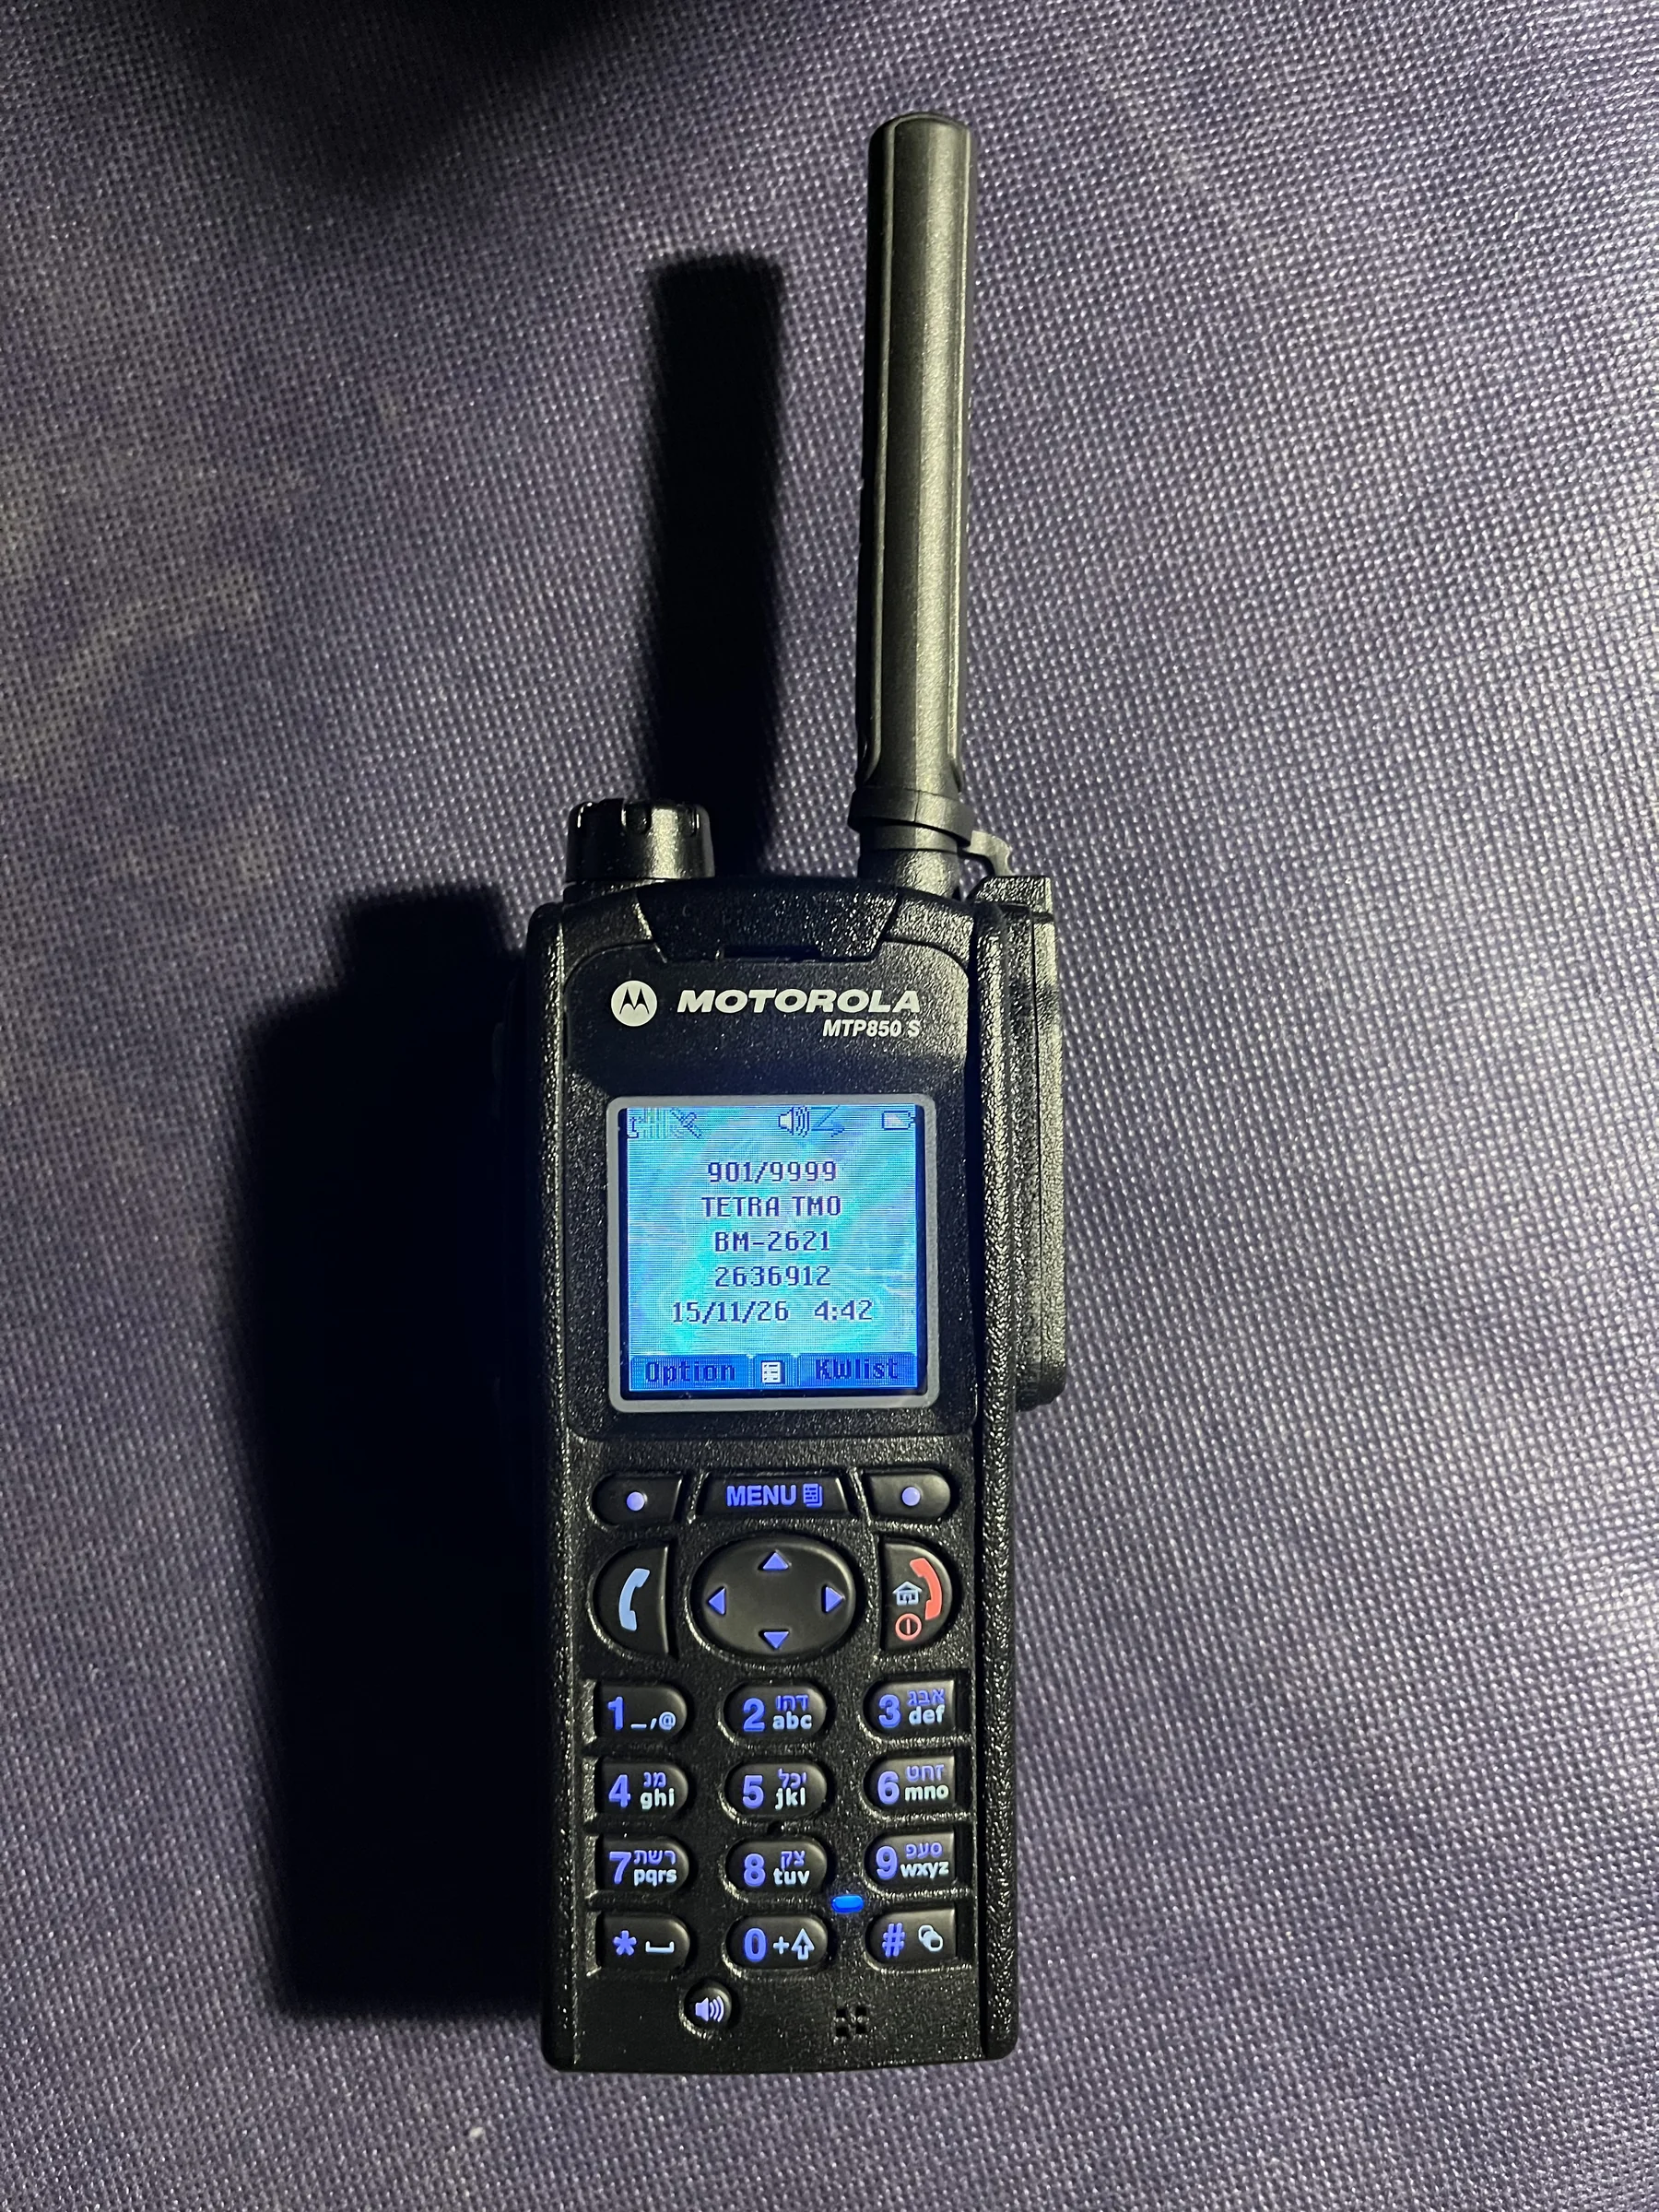
My MTP850s registered on the cell. The display shows 901/9999 and selected group BM-2621. This is the expected result.
5. My web interface
Available to download: the web interface, complete installation guide and free Basic device licence. Download · Register a device.
Try it: an interactive demo shows simulated data, talkgroups, preferred slots, Wi-Fi and diagnostics without installation or login. Open demo · About the demos.
Opening a configuration file for every small change became cumbersome, so I built a browser interface. It runs on the Pi and shows cell status, registered radios and voice activity.
Talkgroups can be subscribed permanently, opened temporarily or used on demand through radio group selection. Radio and network settings, GPS routing, automatic startup and configuration backups are included. German and English are available; question marks explain individual settings.
The screenshots dated 15 November 2026 show my station’s development state. See the download page for the current public release. Click any image to browse the gallery. Some views show my external oscillator. That hardware modification is separate from normal SXceiver setup; see Hardware & Clock in the project article.
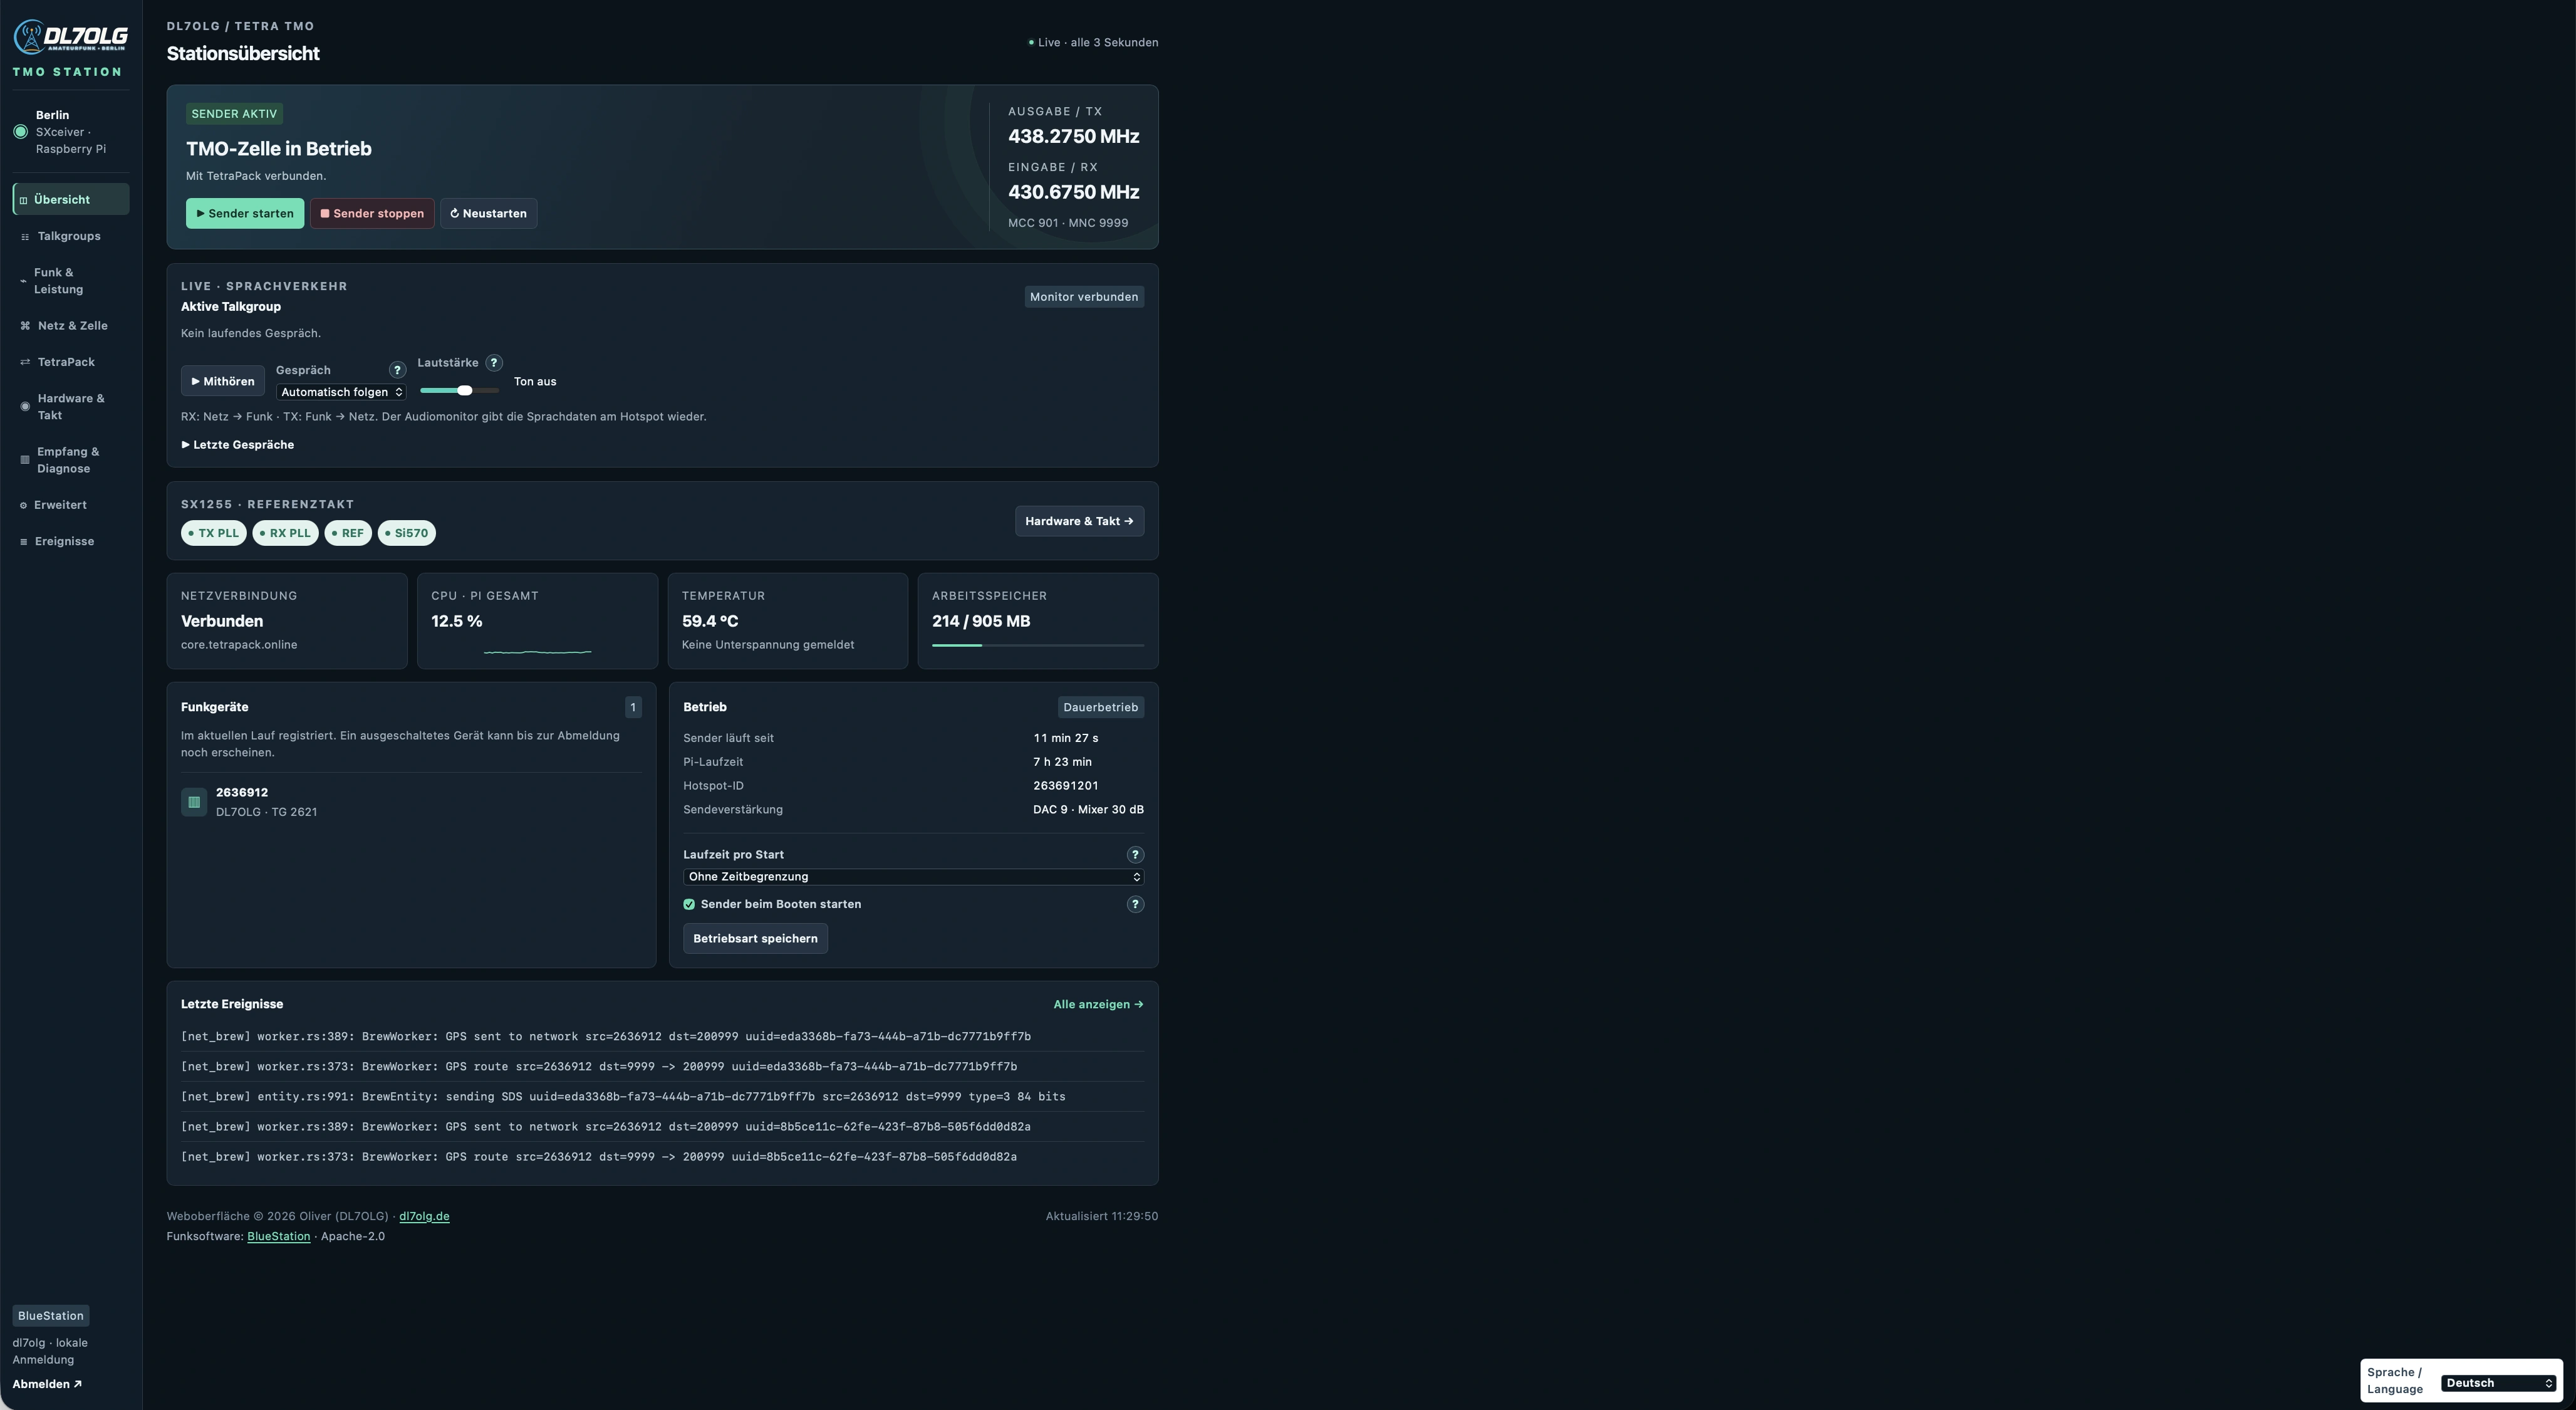
Cell status, registered radios, active TG and browser audio, plus hardware, load, uptime and automatic startup.

Permanent, temporary or on-demand subscriptions. TG 262 and TG 2621 are permanent here.
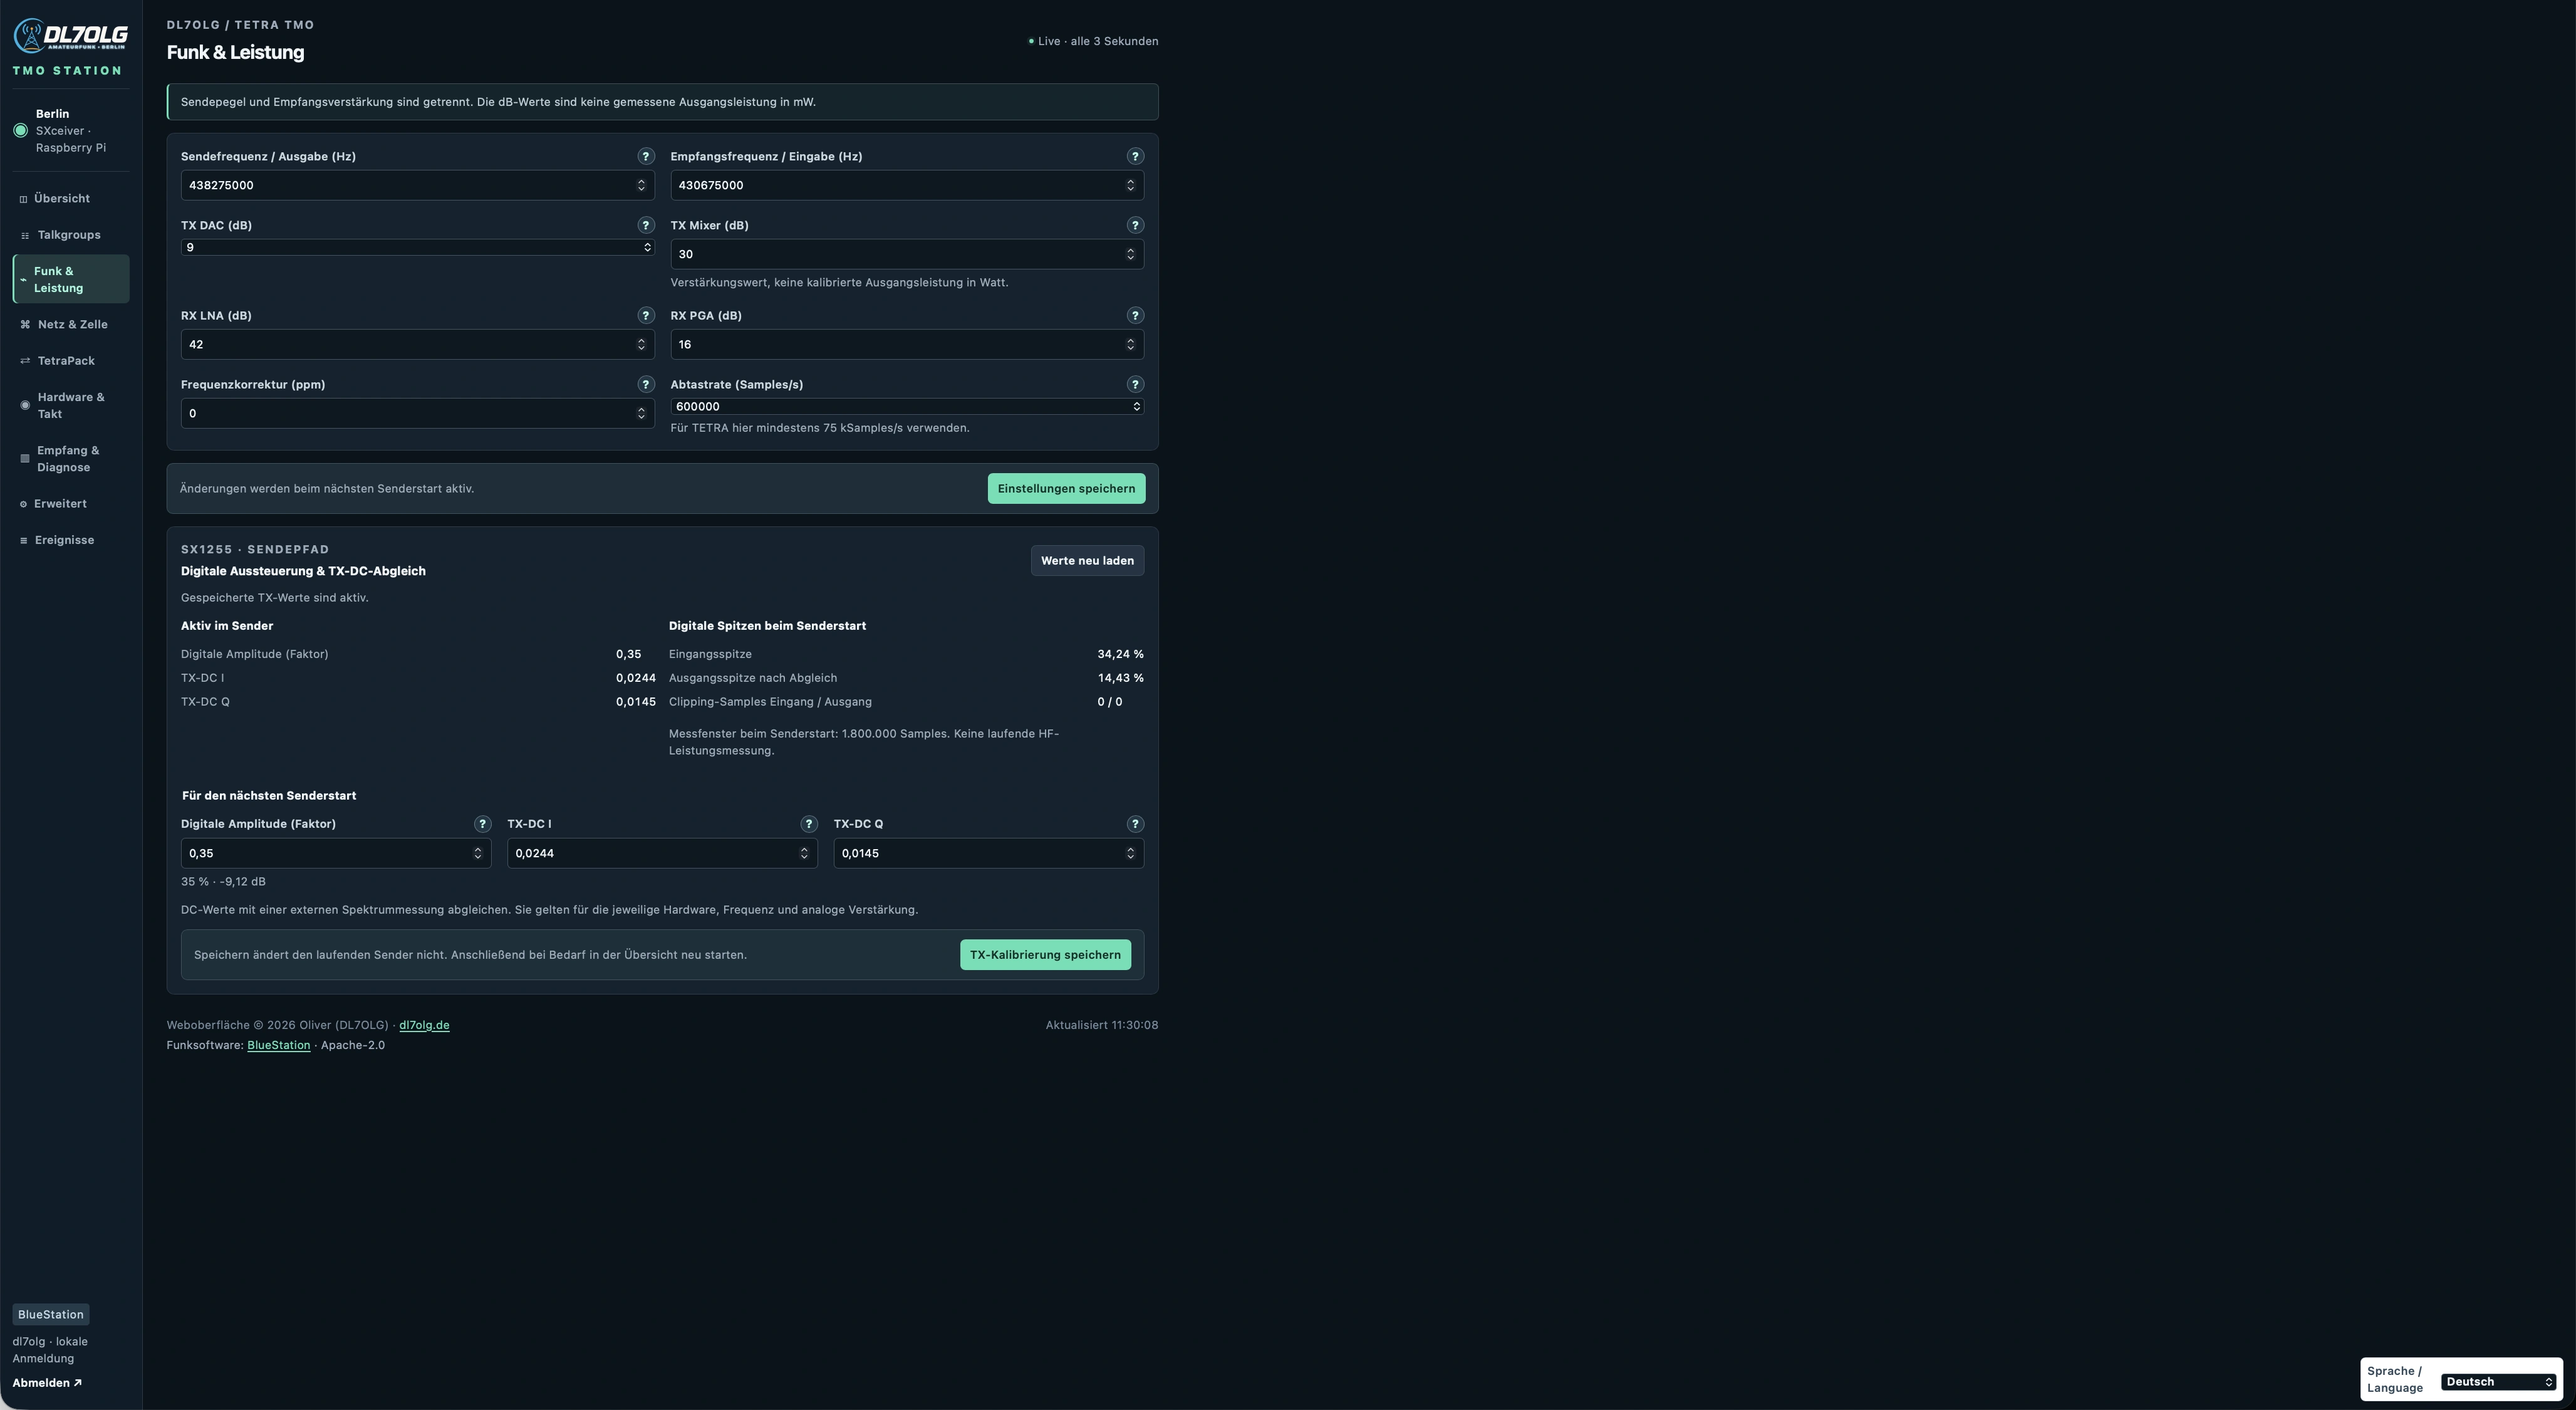
TX/RX frequencies and gain, digital TX amplitude and DC calibration. Gain values are not measured watts.
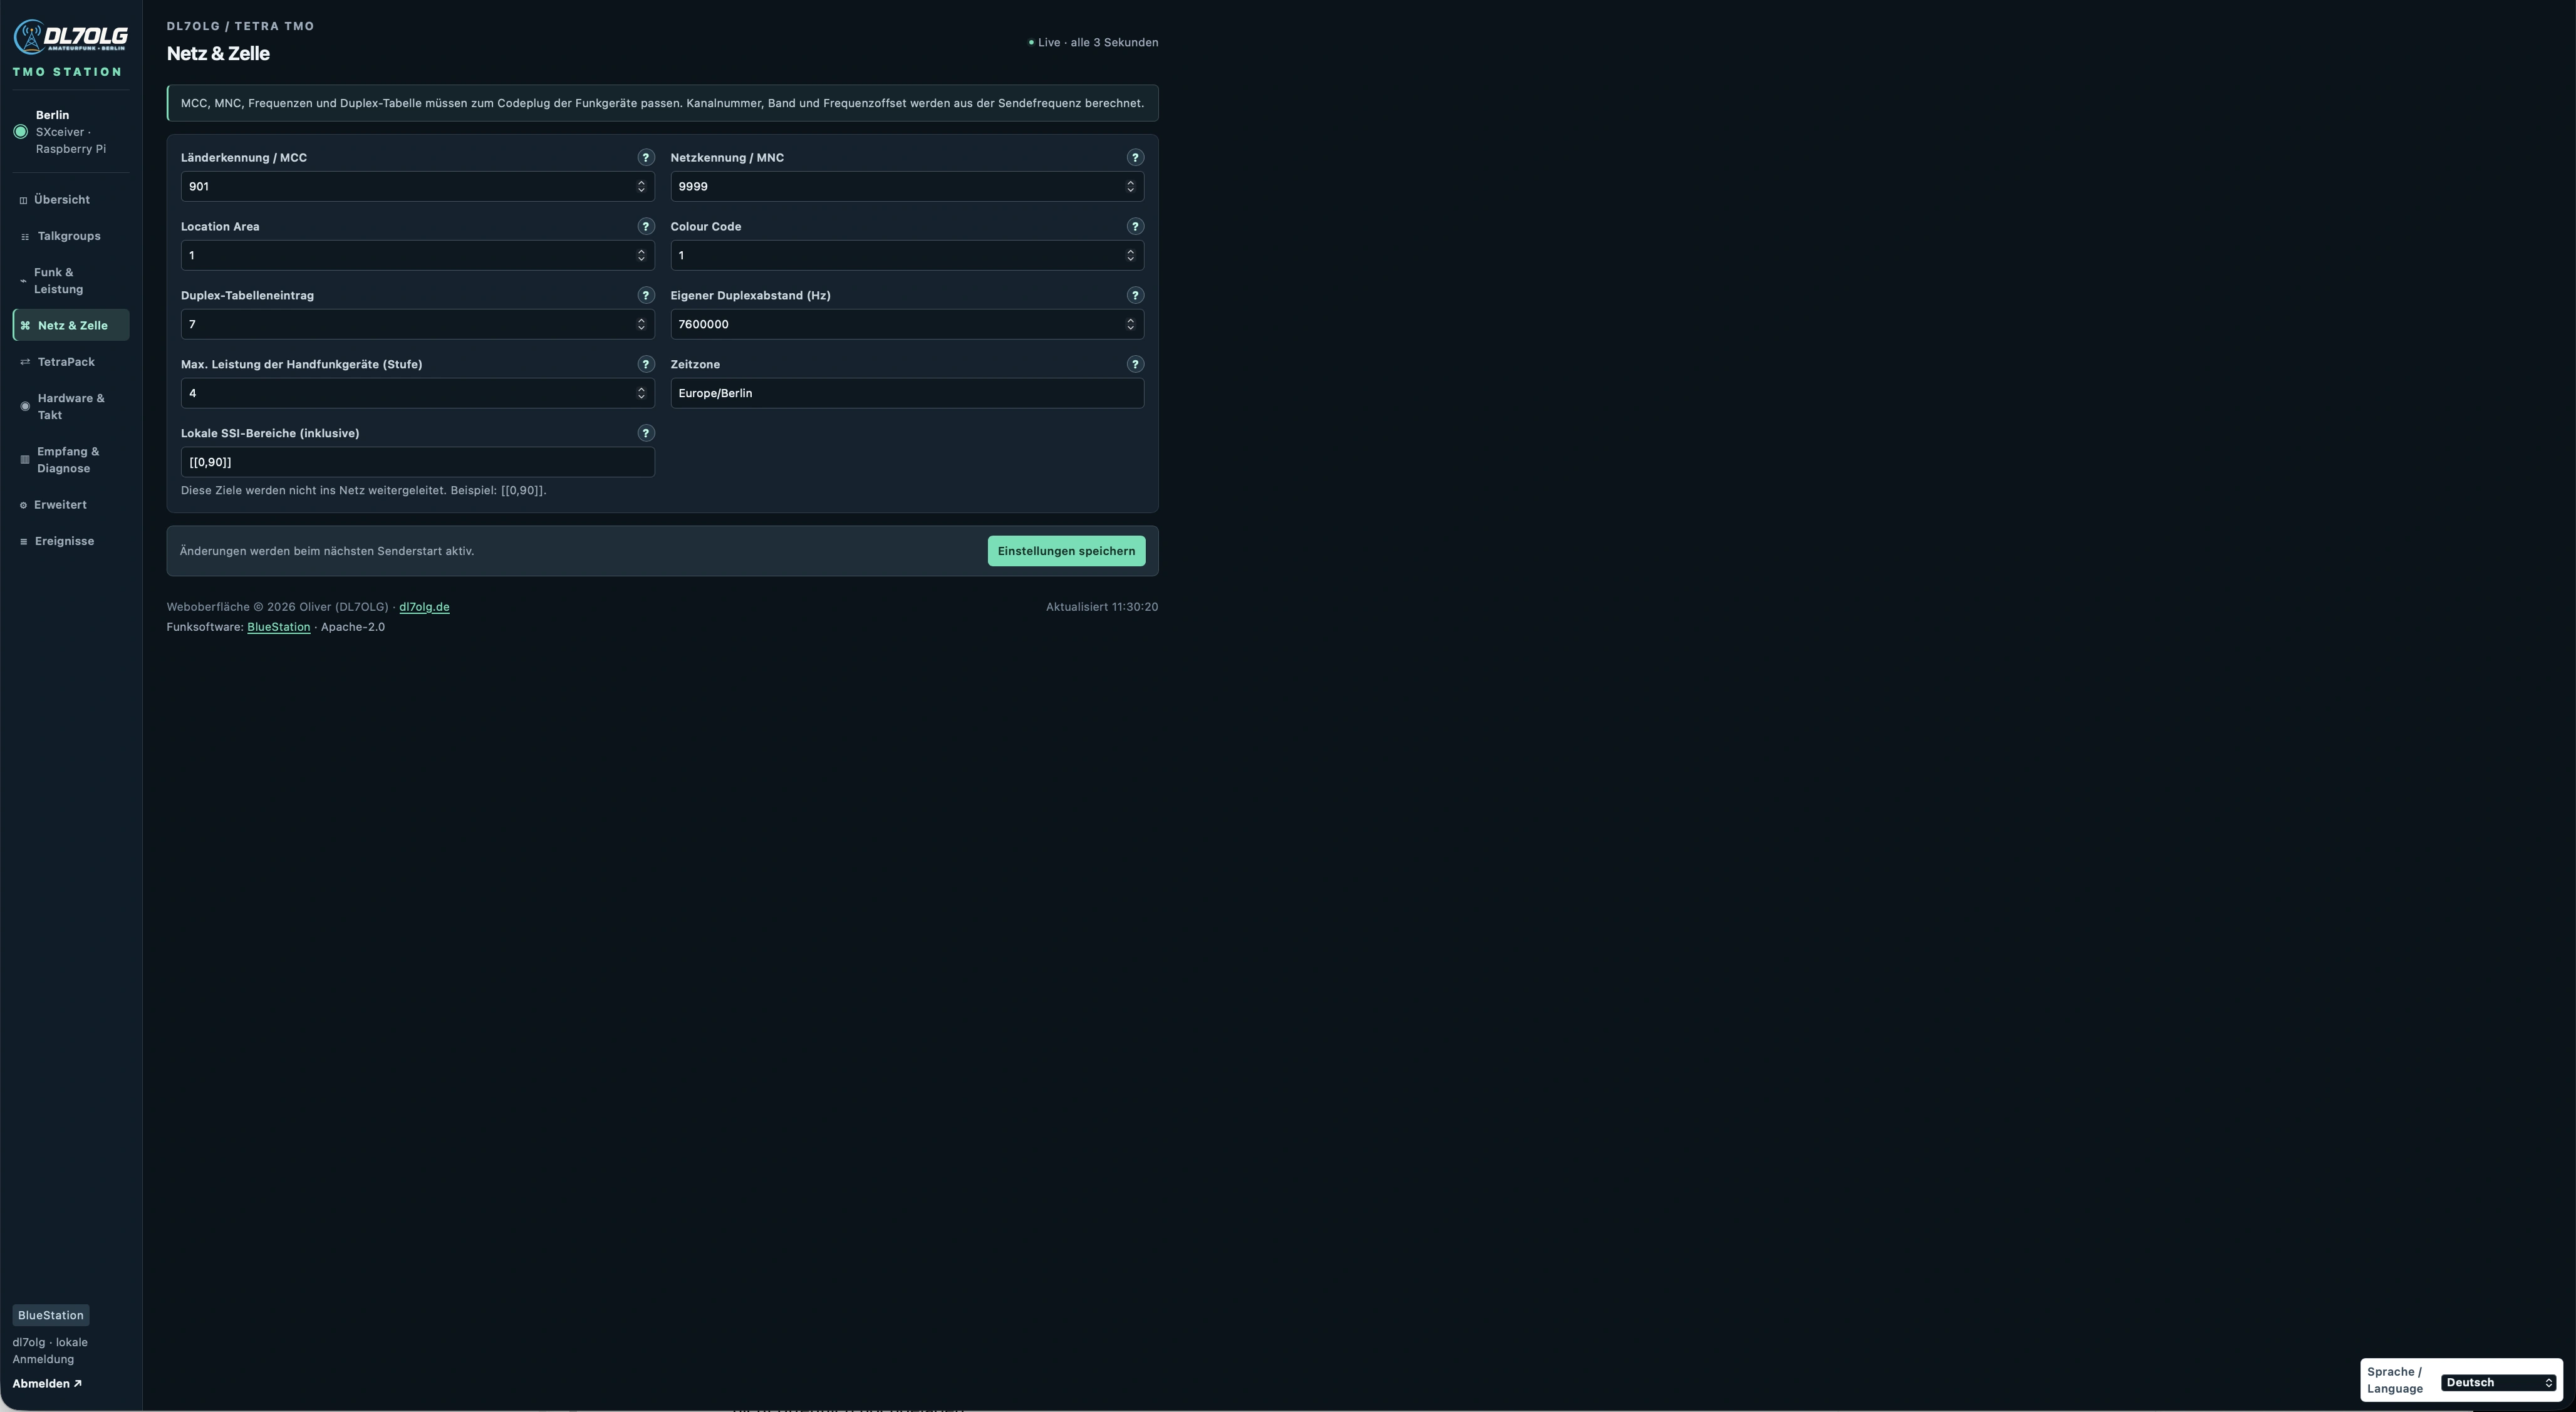
Set MCC, MNC, Location Area and duplex entry to match the codeplug.
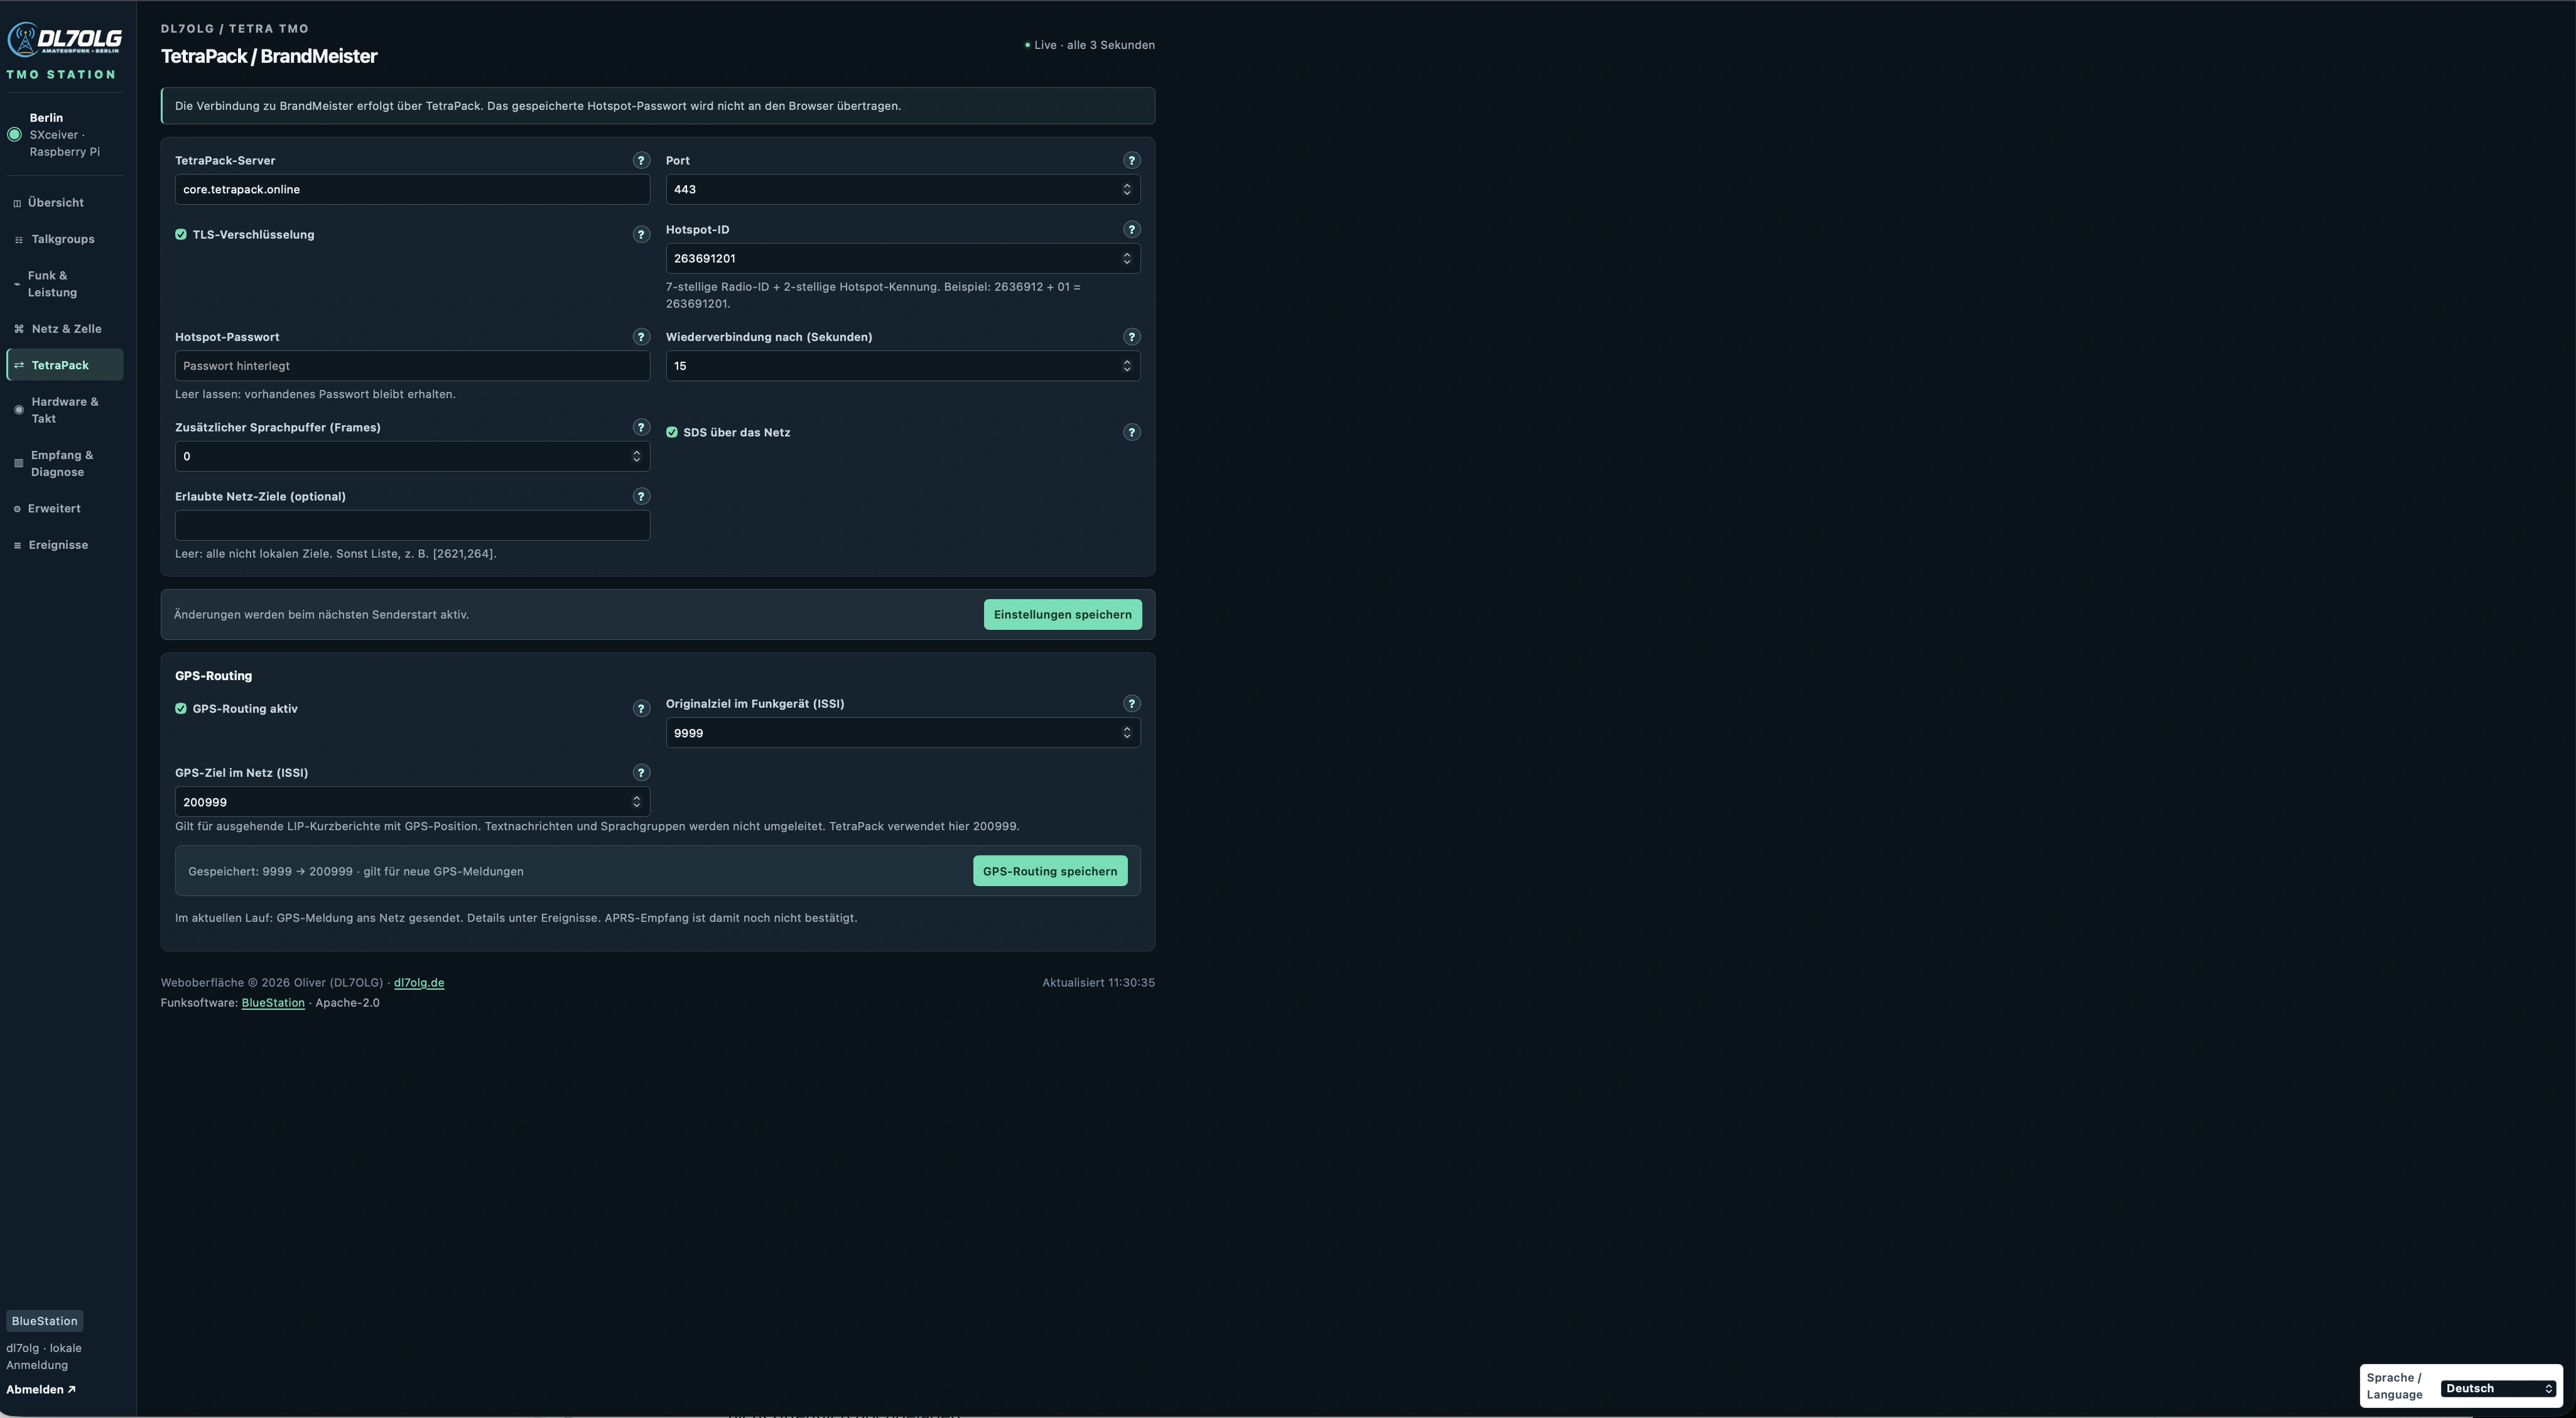
Network login with your hotspot ID, and GPS redirection from 9999 to 200999.
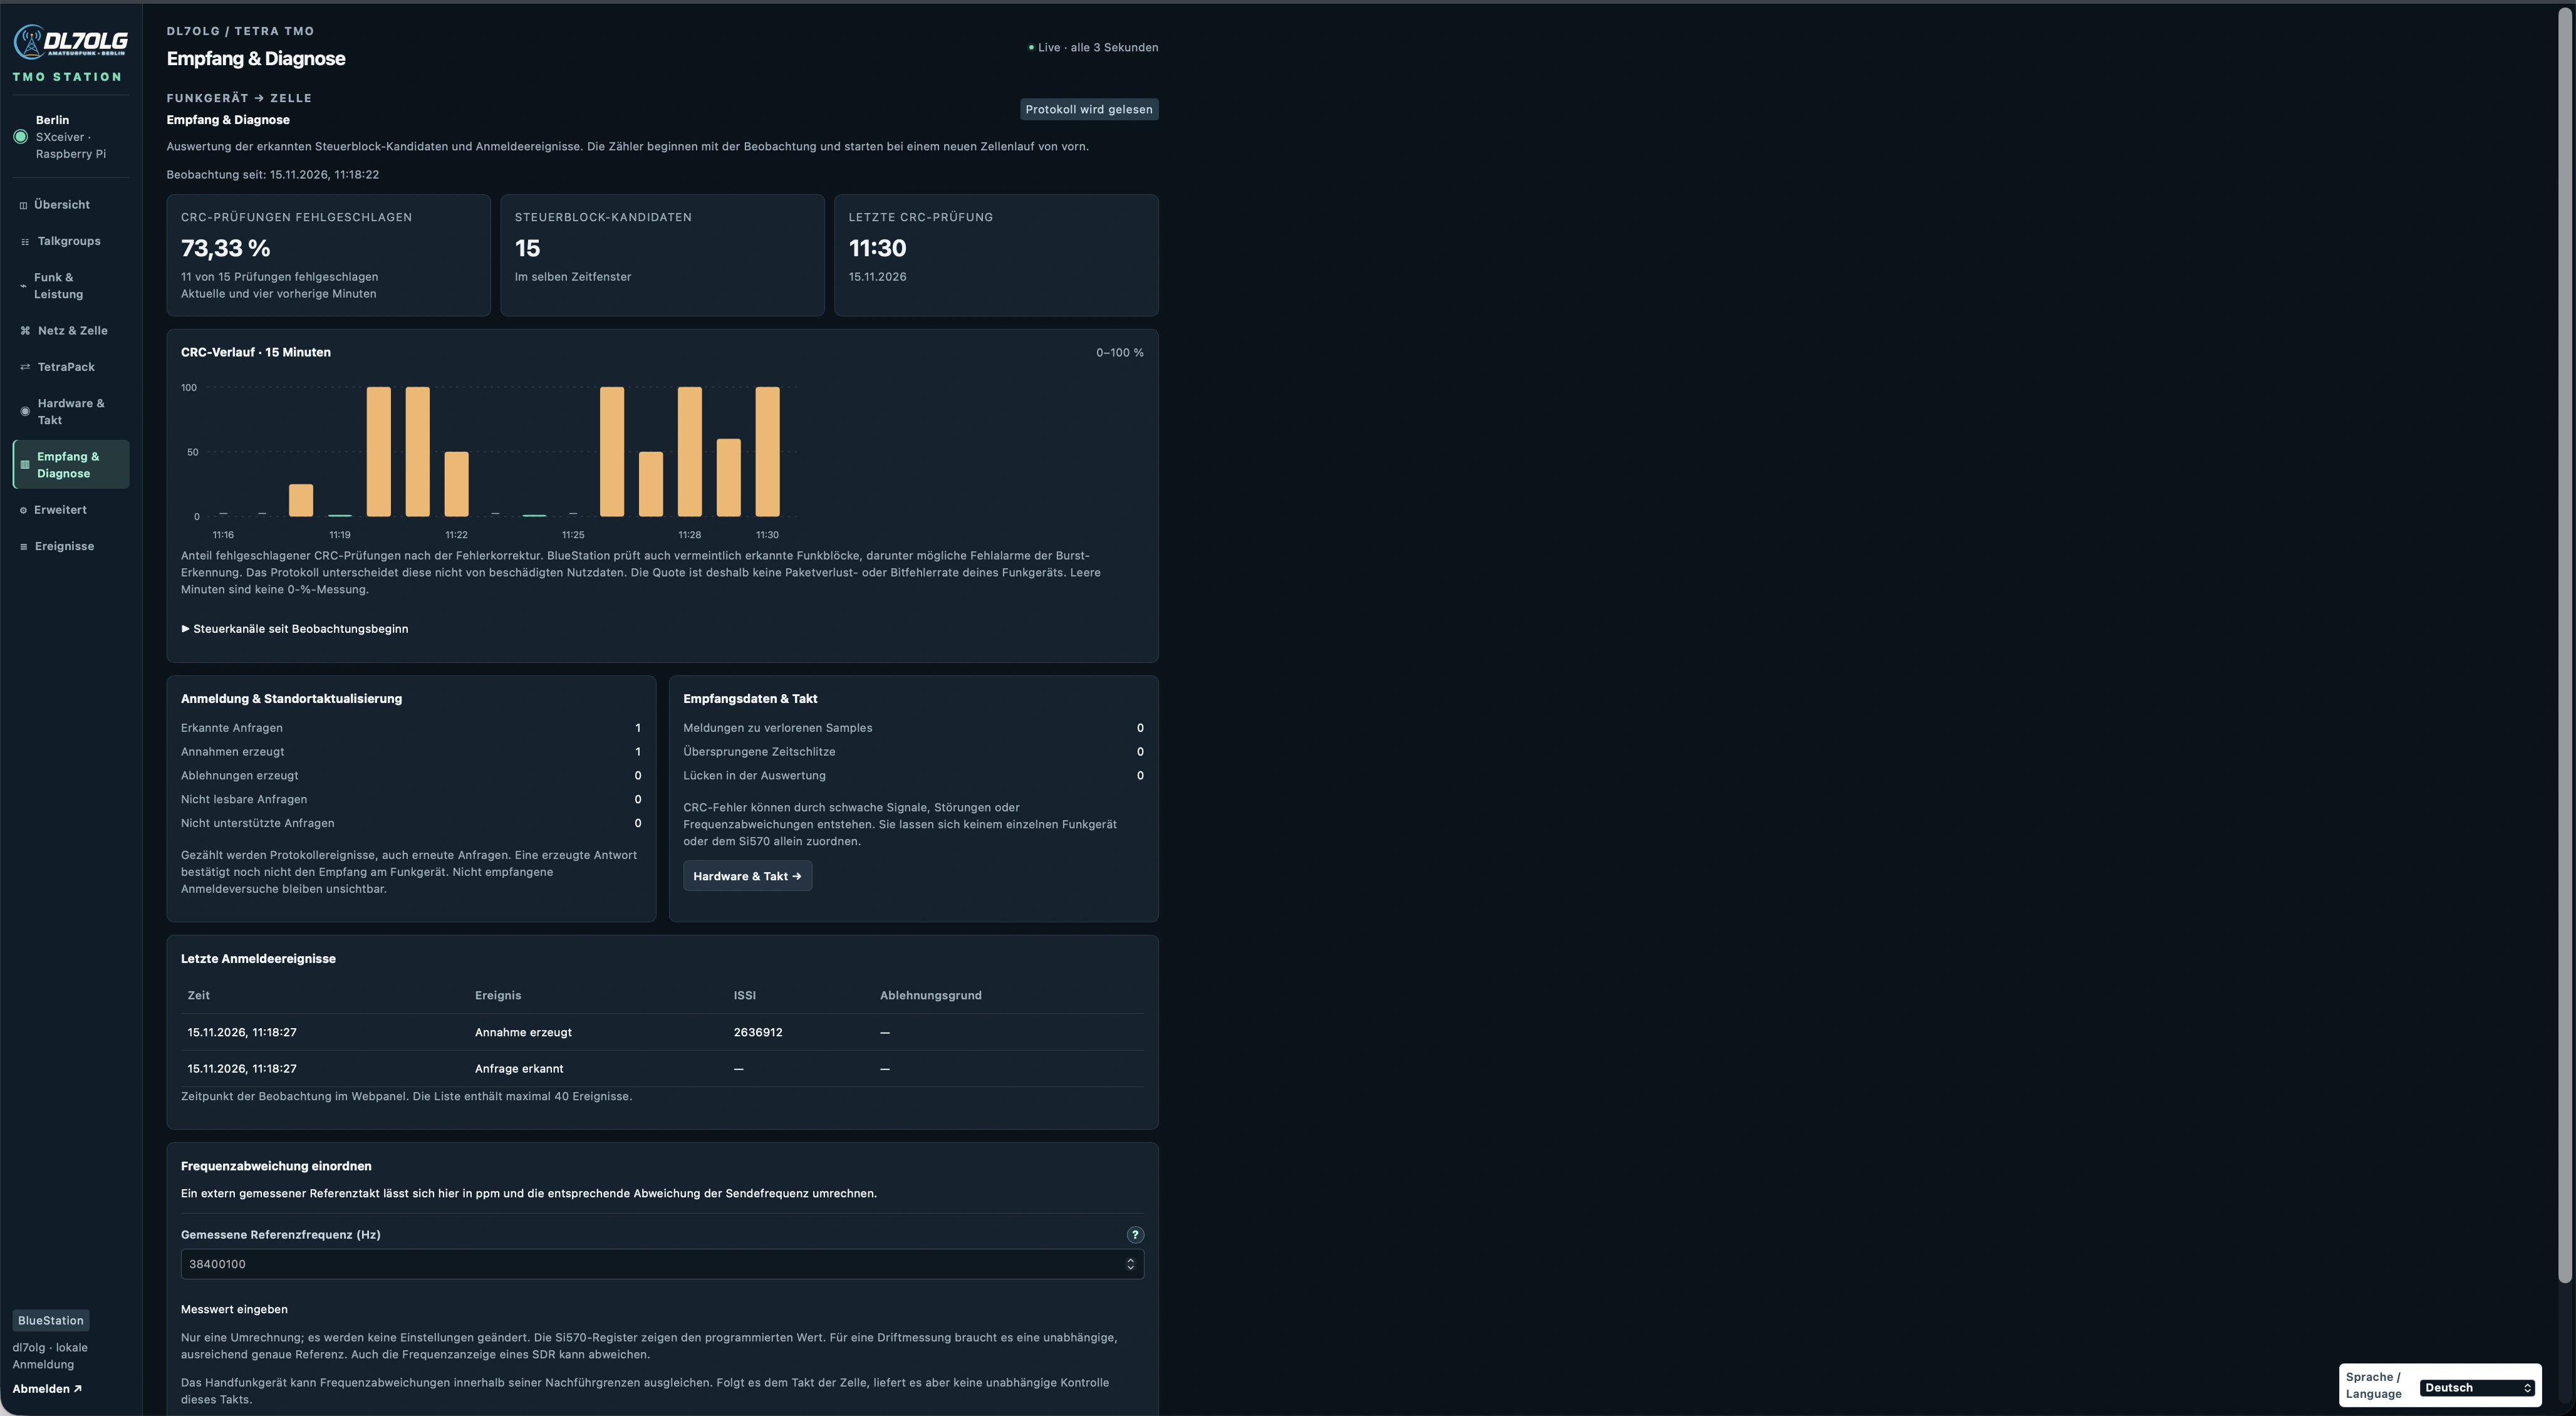
CRC history, registration events and receive information. Failed CRC checks are not the radio’s packet-loss or bit-error rate.
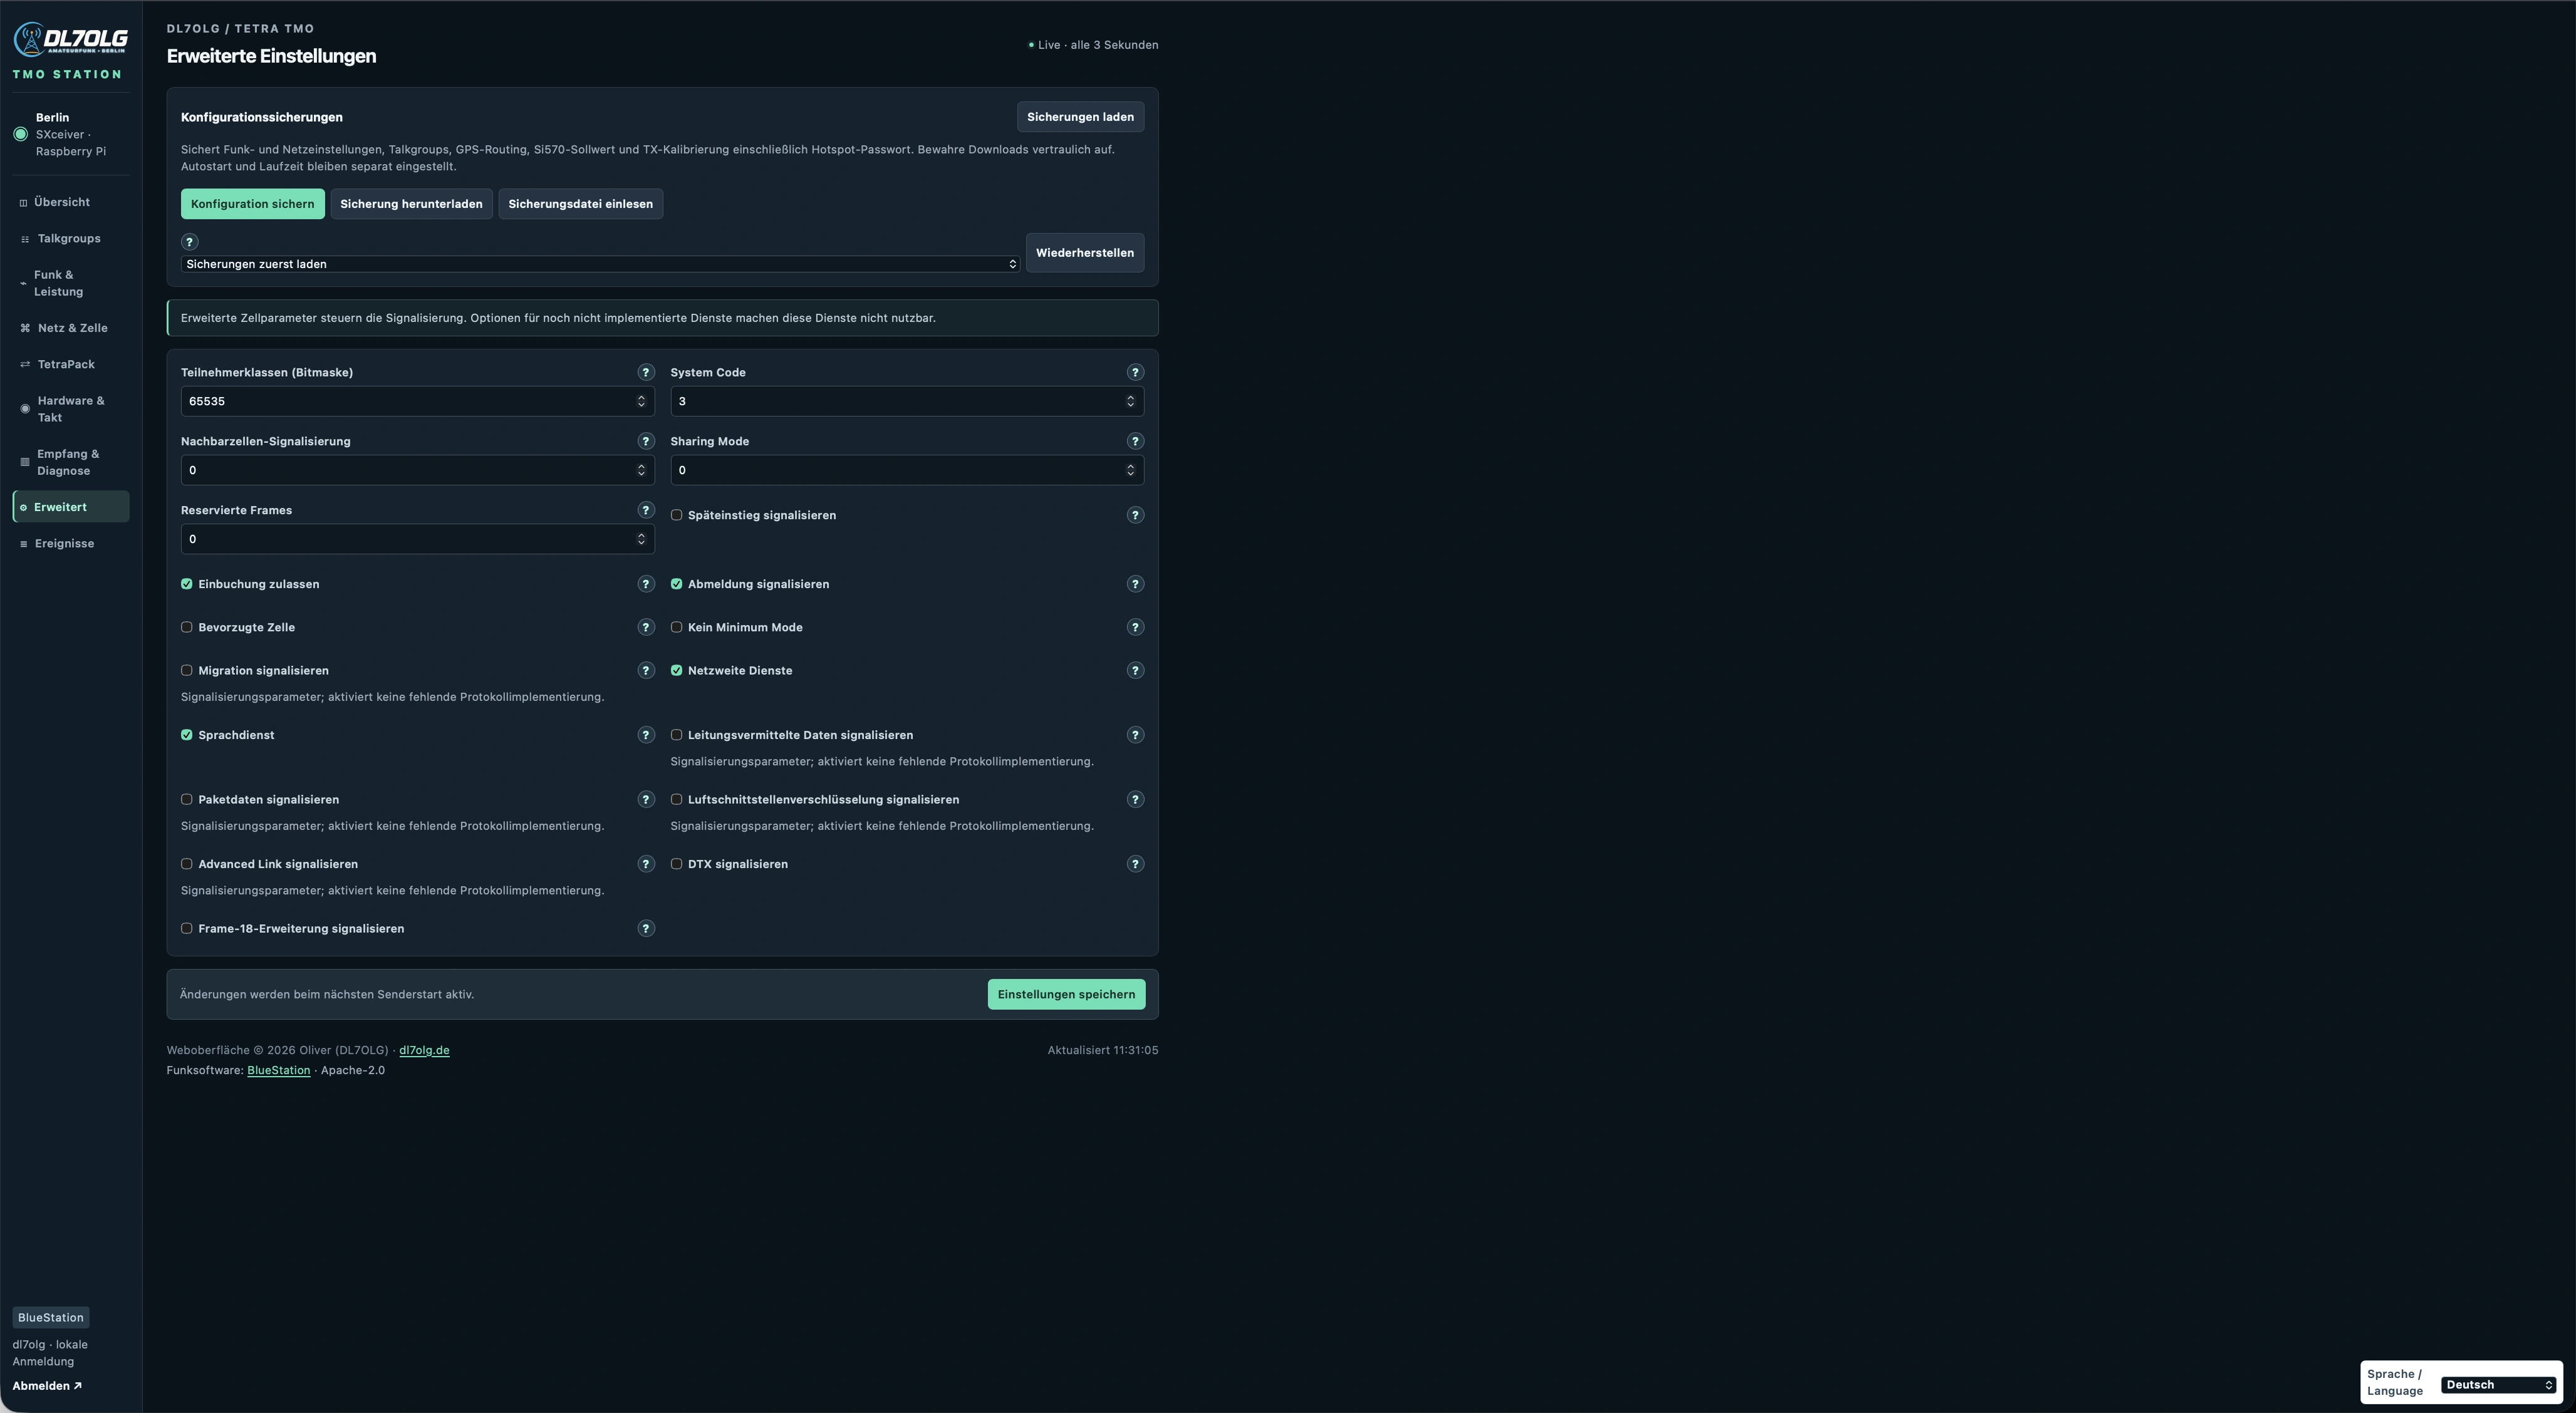
Back up, download and restore configuration; advanced cell parameters follow below.
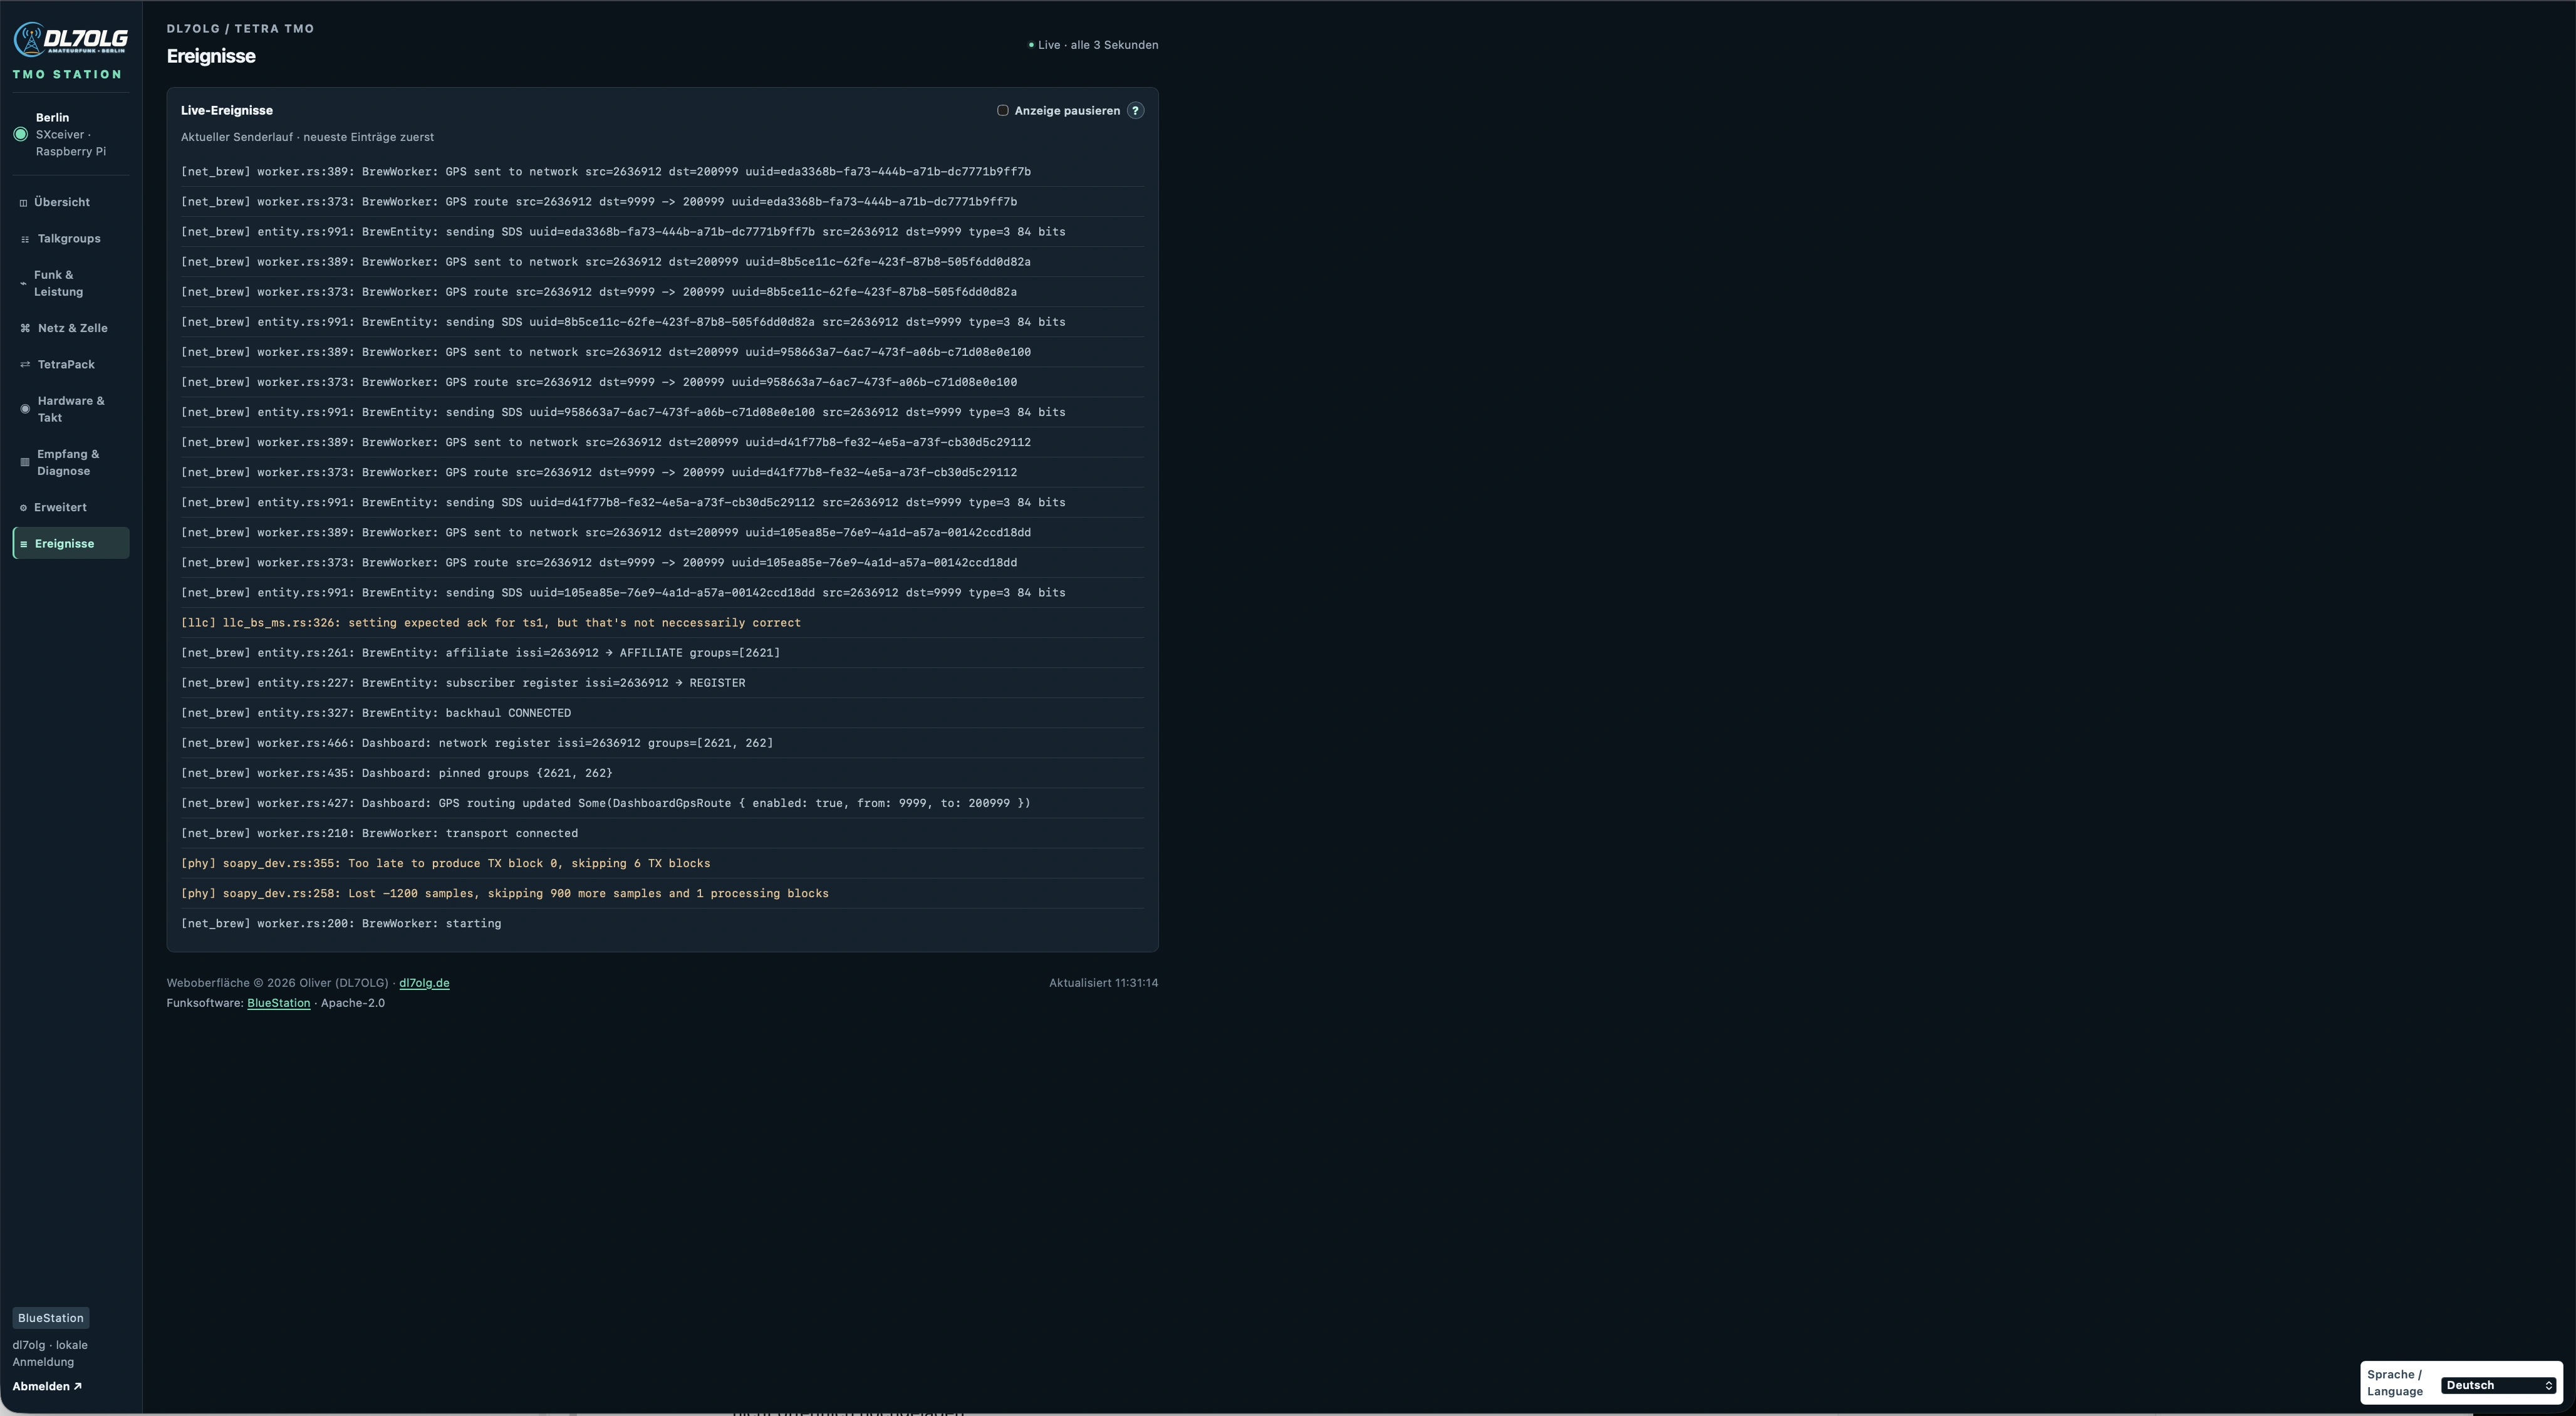
Current BlueStation messages covering registration, calls and GPS forwarding.
GPS routing is an extension to my setup: outgoing LIP short reports addressed to 9999 on the radio are forwarded to 200999. This affects position reports, not voice groups. The basic installation above does not include that extension.